- Technique
- Basic Technique
- Coloring Tutorial
- Fun Tricks With Photoshop
- Recommended Books
- My Art
- Galleries
- About Me
- The Artist
- Resources
- Art Sales
- Back To Main Page
- Basic Technique

- Technique
- Basic Technique
- Coloring Tutorial
- Fun Tricks With Photoshop
- Recommended Books
- My Art
- Galleries
- About Me
- The Artist
- Resources
- Art Sales
- Back To Main Page
- Basic Technique

- Technique
- Basic Technique
- Coloring Tutorial
- Fun Tricks With Photoshop
- Recommended Books
- My Art
- Galleries
- About Me
- The Artist
- Resources
- Art Sales
- Back To Main Page
- Basic Technique

- Technique
- Basic Technique
- Coloring Tutorial
- Fun Tricks With Photoshop
- Recommended Books
- My Art
- Galleries
- About Me
- The Artist
- Resources
- Art Sales
- Back To Main Page
- Basic Technique

- Technique
- Basic Technique
- Coloring Tutorial
- Fun Tricks With Photoshop
- Recommended Books
- My Art
- Galleries
- About Me
- The Artist
- Resources
- Art Sales
- Back To Main Page
- Basic Technique

TECHNIQUE
My Basic Technique
 The Initial Drawing
The first step is usually 2-3 pages of very rough sketches or done without any references just to get the concepts and poses down, after that I take a fresh sheet and block out the general forms of the drawing, references are fairly important at this stage, and I tend to use a variety of sources but mostly I fall back on a large number of pose books, old calendars, and the Hobby Japan EX: Garage Kit Catalogs for references. Once I get part of a drawing down I make photocopies and work on those to get my options straight.
Computer Art
Most of the CG art work that I've done is the end result of a fairly long process that I've worked out, which starts with a pencil sketch and ends with a 200-300 dpi multi-layer Photoshop picture.
Cleaning Up
|
|
 I then clean up the lines and eliminate extra points in the drawing, I then go through and vary the line weight to give the drawing some depth. Sometimes with a shaded drawing or good lineart I'll skip this step to get a better result. I then clean up the lines and eliminate extra points in the drawing, I then go through and vary the line weight to give the drawing some depth. Sometimes with a shaded drawing or good lineart I'll skip this step to get a better result. |
Coloring
|
|
 Once the drawing is colored out I bring it up to RGB and selecting area by area I shade it with the Dodge/Burn tools and then do any filter work that's needed.
|
Final Steps
Backgrounds,and other parts of the beyond the main character I draw separately and then put into the drawing as different layers, giving me some options for final prints, When I want to run off a print I'll copy the initial file and then flatten the image before saving it as a max quality JPEG to take to the printers. While I find that my work comes out best on a Dye-Sub, usually I run off prints on a color laser or Cyclone printer (for larger images) at a nearby printers.
Other Subjects
Coloring Tutorial
This is an adaption of my usual Photoshop coloring technique that I've developed for using on shaded art that I can't take to black and white lines...
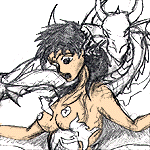 Then use the selection tools (Lasso is good) to trim the block of color to those areas you want to fill with that color Then use the selection tools (Lasso is good) to trim the block of color to those areas you want to fill with that color |
|
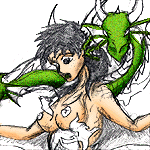 Trim and shade as before then Merge Down to join the two color layers Trim and shade as before then Merge Down to join the two color layers |
|
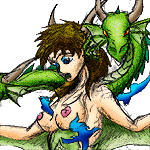 Repeat this process until the picture is colored... Repeat this process until the picture is colored... |
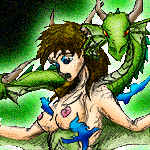 The color layer can also serve as a mask when adding effects to the picture... The color layer can also serve as a mask when adding effects to the picture... |
Other Subjects
Fun Tricks with Photoshop
Short Fur
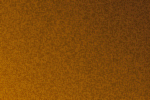 This is a simple application of Kai's Power Tools (KPT) Hue Protected Noise-Minimum followed by a Blur
This also works great for stonework or fine scales |
Adding a slight Ripple filter to this makes for a good wood texture.. |
Hair
|
|
|
|
Scales
|
|
|
|
|
Other Subjects
Recommended books
I'm a voracious reader and I draw inspirational from a wide variety of sources, and use a number of reference and technical books in my work. I've collected the best of these here...
Burne Hogarth: A classic series of artist's how-to and reference, a must have for any serious artist
Photoshop Magic: Books by Greg Simsic and David Lai: a series of Photoshop how-to book that give easy step-by-step instructions for a variety of image effects
Pose Books: This is a series of Japanese artists reference books showing an artist model in a variety of poses.
How To Draw Manga An excellent Japanes series of drawing books
Palladium Books: While primarily designed for roleplaying, this series of refrence works, provides detailed information on a variety of weapons, arms, and armor from all ages, and around the world.
Other Subjects
 Once I've got a finished sketch I load the drawing into Photoshop and cook it until I've got a fairly clear B&W image, which I save as a 72 dpi PICT file. The image then gets booted over Illustrator where I trace over it using the pen tool.
 Once I have a good copy of
the drawing I import it to Photoshop as a 300 dpi grayscale image which I then bring down to a B&W drawing. I save the drawing in a channel and bring it up to indexed color, I then fill in the various color areas with flat colors.
 Long Fur: For longer fur I use KPT Hue Protected Noise:Medium followed by a Motion Blur
 Unlike fur, hair I do by hand starting with a generally shaded area. This technique uses the Toning tools set to a 3 pointed brush
 I then go over the entire area with long strokes of the Burn tool . I make more strokes over the darker shaded areas of the hair
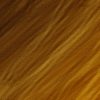 I then repeat the process with the Dodge tool going over the lighter areas more often this time
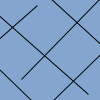 Starting with the background colors and the scale lines drawn in
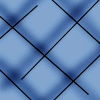 Use the Burn tool to shadow the bottom edges of the scales
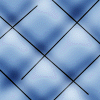 Then I use the Dodge tool to lighten the top edges
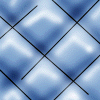 Then add highlights using a light Airbrush tool